Oracle 19c Client Installation on Windows
 Oracle 19c Client Installation on Windows.
Download the Software from https://www.oracle.com/database/technologies/oracle19c-windows-downloads.html
Client Version: 19c
Step 1:
First go to client software path
| C:\software\WINDOWS.X64_193000_client\client |
Step 2:
Open the Setup Application and click on OK
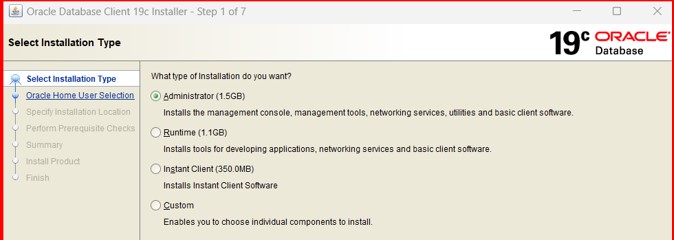
Step 3:
Take default value as it shown in picture. (Administrator)
Step 4:
Take default values as shown in it. (Use windows Bult-in Account)

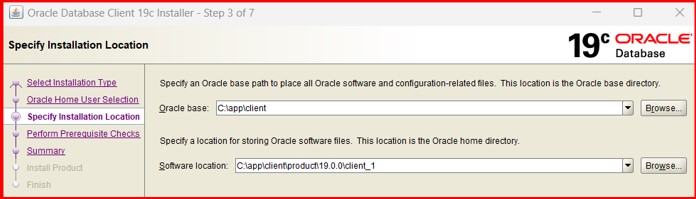
Step 5:
Take values as shown in the screen. (C:\app\client) and click on NEXT.
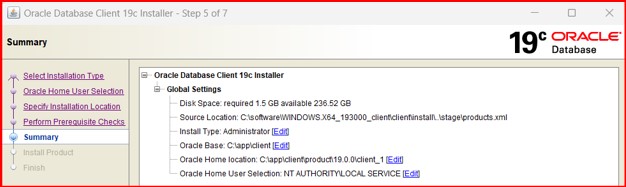
Step 6:
Click on NEXT.
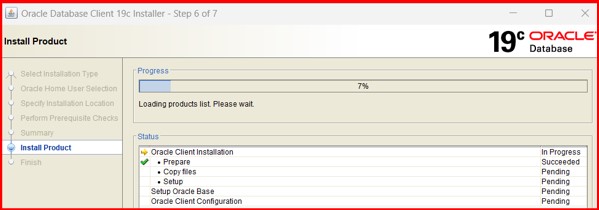
Step 7:
Just verify the progress of installation.
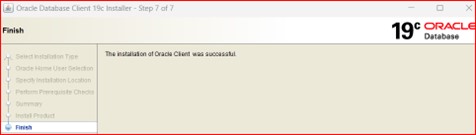
Step 8:
After receiving successful message, click on close.
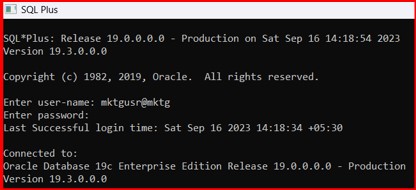
Step 9:
Next verify the Connectivity from client sqlplus tool.
Open the Client SQLPLUS from start menu.

Step 10:
Copy the below TNS names entry in tnsnames.ora under folder:
| C:\app\client\product\19.0.0\client_1\network\admin |
MKTG =
(DESCRIPTION =
(ADDRESS = (PROTOCOL = TCP)(HOST = localhost)(PORT = 1521))
(CONNECT_DATA =
(SERVER = DEDICATED)
(SERVICE_NAME = MKTG)
)
)
If there is no tnsnaes.ora file, create it.
Enter the credentials as mentioned in the below screen.
See Also: